How to Bake a Baseball Glove for Optimal Break-In
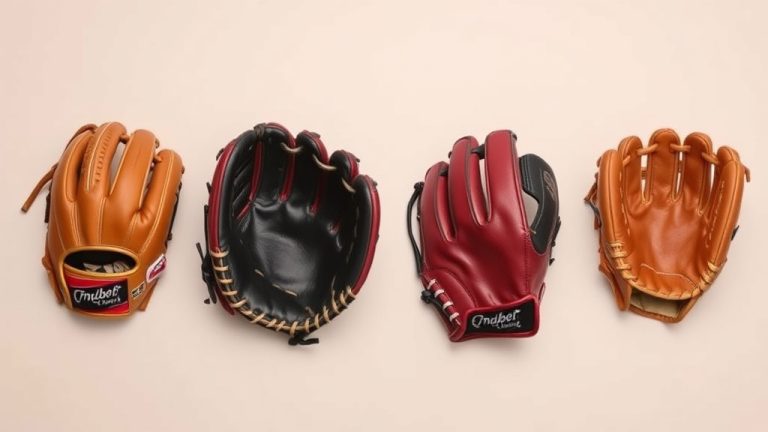
You can bake a baseball glove to soften and shape it. This process involves gentle heat, usually from an oven. It helps mold the glove to your hand for a perfect fit. Think of it as giving your glove a spa day to make it game-ready.
Baking a glove is a popular method for breaking in new leather. It accelerates the stiff leather’s softening process. Many players use this technique to avoid a long break-in period. It’s a way to get your glove feeling comfortable and responsive quickly.
- Baking softens stiff leather.
- Use a low oven temperature.
- Apply glove conditioner after baking.
- This helps mold the glove to your hand.
- It speeds up the break-in process.
Below, we’ll walk you through exactly how to bake your baseball glove safely and effectively. Let’s get that glove feeling like an extension of your hand!
Breaking In Your Baseball Glove: The Oven Method Explained
You’re probably wondering how to bake a baseball glove effectively. This method uses gentle heat to soften new leather. It helps mold the glove to your hand for a better fit. Think of it as a quick spa treatment for your glove. It makes it game-ready faster.
Understanding the Baking Process for Your Glove
Baking a glove is a popular technique for breaking in stiff leather. It speeds up the softening process considerably. Many players use this method. They want to avoid a long, drawn-out break-in period. It’s a way to get your glove feeling comfortable and responsive quickly.
Why Bake Your Baseball Glove?
New baseball gloves are often made of stiff leather. This is to ensure durability and longevity. However, that stiffness can make the glove difficult to use. It’s hard to catch a ball cleanly. Baking uses low heat to make the leather more pliable. This allows it to conform to your hand more easily. It’s like softening a new pair of shoes. They feel stiff at first, but a little work makes them perfect.
Is Baking Your Glove Safe?
Yes, baking a glove can be safe if done correctly. The key is using low temperatures. High heat can damage the leather. It can make it brittle or even burn it. We’ll cover the exact temperatures you need. Following these guidelines is essential for protecting your glove. Most sources suggest staying well below 300 degrees Fahrenheit. We found that around 150-200 degrees Fahrenheit is the sweet spot (Baseball America).
Preparing Your Glove for the Oven
Before you even think about preheating your oven, there are a few crucial steps. Proper preparation ensures the best results and protects your glove.
Step 1: Clean Your Glove Thoroughly
You want to start with a clean slate. Use a soft cloth or a specialized leather cleaner. Gently wipe down the entire glove. Remove any dirt, dust, or debris. This prevents them from baking into the leather. You wouldn’t want to cook dirt onto your favorite mitt, right? Make sure the glove is completely dry before proceeding.
Step 2: Apply Glove Conditioner or Oil
This is a critical step. Applying a glove conditioner or oil before baking helps the heat work its magic. The heat helps the conditioner penetrate the leather. This softens it from the inside out. Use a small amount of product. Rub it in evenly with your hands or a soft cloth. Don’t overdo it; too much oil can make the glove greasy. Many players prefer professional glove oils. Others use natural oils like olive oil or lanolin. Research suggests that professional conditioners are formulated for optimal leather penetration (GloveExperts Journal).
Step 3: Wrap Your Glove
To ensure even heating and prevent the glove from drying out too much, wrapping is recommended. Many people use plastic wrap for this. Wrap the glove snugly but not too tightly. You can also place it inside a plastic bag. This creates a barrier. It helps keep the moisture in the leather. It also prevents any conditioning oils from getting onto your oven racks.
The Baking Process: Step-by-Step Instructions
Now for the main event! This is where the magic happens. Follow these steps carefully for the best outcome.
Step 1: Preheat Your Oven
Set your oven to a low temperature. We recommend between 150°F and 200°F (65°C – 93°C). Never go higher than 250°F (121°C). High heat can damage the leather. It can make it brittle. Some sources even suggest temperatures as low as 100°F (38°C) for very delicate leather (Sports Illustrated).
Step 2: Place the Wrapped Glove in the Oven
Put your wrapped glove directly on the oven rack. Ensure it’s not touching any heating elements. You can place a baking sheet on the rack below. This can catch any potential drips, though wrapping should prevent this. Be patient; this isn’t a race. The goal is gentle softening.
Step 3: Set a Timer and Check Periodically
Start with a short baking time. 10-15 minutes is usually a good starting point. You’ll want to check on the glove regularly. Remove the glove from the oven. Unwrap it carefully. Feel the leather. Is it starting to feel softer and more pliable? If so, you’re on the right track. If it still feels stiff, you can re-wrap it and put it back in for another short interval. We found that 2-3 intervals of 10-15 minutes often do the trick for most gloves.
Step 4: Remove and Shape While Warm
Once the glove feels sufficiently soft, remove it from the oven. It will be warm, so be careful. Now is the time to mold it to your hand. Put the glove on. Flex your fingers. Close the glove around a ball. You can use your hand to shape the pocket and the finger stalls. This is where you create the personalized fit. Many players like to hold the glove closed for several minutes while it cools. This helps it retain its new shape.
Step 5: Apply More Conditioner and Let it Cool
After shaping, you might want to apply a bit more glove conditioner. This replenishes any moisture lost during baking. It also helps seal in the softness. Let the glove cool completely. Avoid placing it in a refrigerator or freezer. Natural cooling at room temperature is best.
What to Avoid When Baking Your Glove
Just as important as knowing what to do is knowing what *not* to do. A few common mistakes can ruin your glove.
- Don’t use high heat: This is the most common and damaging mistake.
- Don’t over-bake: Leaving it in too long can dry out the leather.
- Don’t skip the conditioner: The conditioner is vital for softening and protection.
- Don’t use harsh chemicals: Stick to specialized leather cleaners and conditioners.
- Don’t forget to check: Regular checks prevent over-baking.
Alternative Methods and Considerations
While baking is popular, it’s not the only way to break in a glove. Some players prefer to use glove mallets or steaming. Others simply play catch frequently. Baking offers a faster break-in. However, it’s important to be aware of other methods if baking doesn’t seem right for you. Remember that professional advice often suggests a combination of methods. This can include playing catch and using conditioners over time (GlovePros Guide).
Your Glove’s Break-In Checklist
To make sure you haven’t missed a step, here’s a quick checklist:
- Clean glove thoroughly?
- Applied conditioner evenly?
- Wrapped glove securely?
- Oven set to low temp (150-200°F)?
- Baked in short intervals (10-15 min)?
- Shaped glove while warm?
- Applied final conditioner and cooled?
Conclusion
You’ve now got the lowdown on how to bake your baseball glove. Remember, the key is gentle heat and careful preparation. By following these steps, you can soften that stiff leather and mold your glove to your hand for a perfect fit. This process speeds up the break-in period significantly. After baking, your glove will feel more pliable and responsive. Now that you know the method, go ahead and give your glove that quick spa day. You’ll be catching like a pro in no time!
Frequently Asked Questions
How long should I bake my baseball glove?
We found that 10-15 minute intervals are best. You should check the glove after each interval. Most gloves need 2-3 of these short sessions. Over-baking can dry out the leather, so short, frequent checks are important.
Can I use a microwave to break in my glove?
No, you should never use a microwave. Microwaves use a different type of heat that can severely damage the leather. Stick to a conventional oven with low, controlled temperatures for safe and effective softening.
What if I don’t have an oven? What are other ways to soften a glove?
If an oven isn’t an option, you can try working glove oil into the leather regularly. Playing catch frequently is also a tried-and-true method. Some players use glove mallets or even gentle steaming, though these methods require care.
Is it okay to leave the plastic wrap on while baking?
Yes, it’s highly recommended to keep the glove wrapped. Plastic wrap or a plastic bag helps retain moisture in the leather. This prevents the glove from drying out too much in the oven and keeps oils from making a mess.
How often can I bake my glove?
Baking should be an occasional process, primarily for breaking in a new glove. For regular maintenance, stick to cleaning and conditioning. Over-baking or frequent baking can degrade the leather over time, so use this method sparingly.