How to Use a Hammam Glove for Glowing Skin
To properly use a hammam glove, you’ll want to soak your skin thoroughly first. Then, firmly but gently exfoliate your skin in long strokes. This helps remove dead skin cells for a smoother, brighter complexion. Remember, it’s all about achieving that revitalizing glow!
Using a hammam glove, also known as a kessa, is a traditional part of Middle Eastern bath rituals. It’s designed to give you a deep cleanse and exfoliation. Many people find it leaves their skin feeling incredibly soft and refreshed. It’s a fantastic way to boost your self-care routine!
- Soak your skin well before starting.
- Use firm, upward strokes with the glove.
- Rinse thoroughly afterward.
- Moisturize your skin to keep it hydrated.
Ready to give your skin the ultimate pampering? Let’s walk through exactly how to use your hammam glove step by step for the best results.
“`htmlMastering Your Hammam Glove Technique
You’ve got your hammam glove, and you’re ready for that spa-like experience at home. But how do you actually use it? It’s simpler than you might think! We’ll guide you through the process to get your skin feeling absolutely amazing. Think of it as a mini-spa day, right in your own bathroom.
Preparing Your Skin for Exfoliation
The most important first step is properly preparing your skin. A dry scrub with a hammam glove can be too harsh. You want your skin to be warm and soft. This makes it much easier for the glove to do its magic. It also helps prevent any irritation.
The Importance of a Good Soak
Before you even think about reaching for the glove, take a good, long soak. A warm bath or a steamy shower is perfect. Aim for at least 10-15 minutes. This is crucial for softening your skin. The warmer the water, the better it opens up your pores. This allows for a deeper clean. You’ll find that dead skin cells are much looser and ready to be swept away. Don’t rush this part; it’s the foundation of your hammam ritual.
What About Soap or Body Wash?
This is a common question! Generally, you’ll use the hammam glove after you’ve used your usual soap or body wash. Wash your body as you normally would. Rinse off the soap. Then, the steamy, softened skin is ready for the glove. Some traditions might use a special black soap before the glove, but for home use, a standard wash is fine. The key is that your skin is clean and damp, not dry.
The Exfoliation Process: Glove to Skin
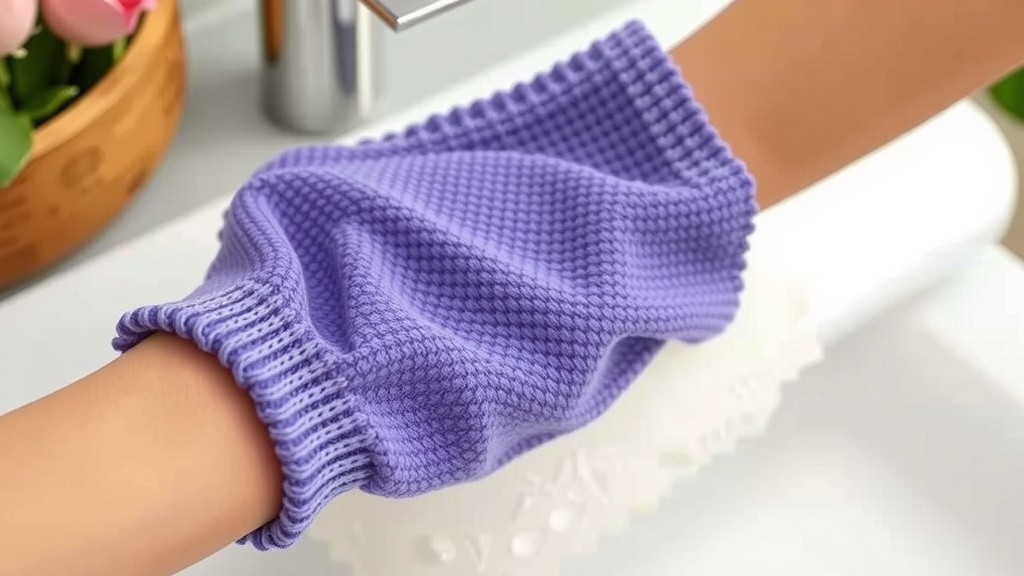
Now for the main event! Holding the hammam glove is straightforward. Slip your hand into the elasticated cuff. Make sure it fits snugly but isn’t too tight. You want control over the glove’s movement. Now, let’s talk technique.
Gentle Yet Firm Strokes
The best way to use the glove is with long, firm strokes. Imagine you’re trying to smooth out a wrinkled tablecloth. Move the glove up your body, towards your heart. Start with your arms and legs. Work your way up towards your torso. Don’t scrub back and forth rapidly. Steady, deliberate strokes are more effective. They help lift away dead skin cells without being abrasive.
Direction Matters
Always exfoliate in an upward motion. Think of it as moving the dead skin cells off your body. For your limbs, this means stroking from your extremities towards your center. For your back, reach as best you can or ask a partner for help. This direction helps with circulation, too. Many skincare professionals recommend this direction for lymphatic drainage (NCBI).
Areas to Focus On (and Avoid)
Pay extra attention to areas that tend to get rough. Your elbows, knees, and heels are prime candidates. You might see dead skin rolling off; this is normal and a good sign! However, be gentle on more sensitive areas. Avoid using the glove on your face unless you have a specific, extra-soft facial exfoliating mitt. Also, steer clear of any broken skin, sunburns, or active rashes. Your skin should feel invigorated, not irritated.
Post-Exfoliation Care: The Finishing Touches
You’ve done the hard work! Now, it’s time to care for your newly revealed, smooth skin. This step is just as vital as the exfoliation itself. It seals in the benefits and keeps your skin happy.
Rinsing Off Dead Skin
After you’ve finished exfoliating your entire body, rinse off thoroughly. Use warm water to wash away all the dead skin cells and any debris. Make sure your skin is completely clean. You should be able to run your hands over your skin and feel a noticeable difference – it should feel incredibly smooth!
Hydration is Key
This is where you lock in that softness. As soon as you’re done rinsing, pat your skin gently with a soft towel. Don’t rub vigorously; you want to retain some moisture. Apply a generous amount of your favorite moisturizer, body oil, or lotion. This is especially important if you have dry skin. Look for ingredients like shea butter or hyaluronic acid for extra hydration (Cleveland Clinic). Your skin has just been deeply cleansed; it’s ready to be nourished.
Caring for Your Hammam Glove
To ensure your hammam glove lasts and remains hygienic, proper care is essential. It’s simple but often overlooked.
Cleaning and Drying
After each use, rinse your glove thoroughly with clean water. Squeeze out any excess water. Then, hang it up to dry completely. Make sure it’s in a well-ventilated area. Avoid leaving it in a damp shower caddy. Moisture can lead to mildew. Most hammam gloves can be hand-washed with mild soap occasionally. Check the manufacturer’s instructions for specific cleaning advice.
When to Replace It
Like any exfoliating tool, a hammam glove wears out over time. You’ll notice the fabric might start to thin or fray. If it loses its exfoliating texture, it’s probably time for a new one. Generally, replacing your glove every 3-6 months with regular use is a good guideline.
Quick Hammam Glove Checklist
- Soak skin in warm water for 10-15 minutes.
- Wash with soap, then rinse well.
- Use the glove with firm, upward strokes.
- Focus on rough areas, be gentle elsewhere.
- Rinse skin thoroughly after exfoliating.
- Apply moisturizer immediately to damp skin.
Conclusion
You’ve now learned the art of using your hammam glove to achieve beautifully smooth skin. Remember, the key is proper preparation with a warm soak, followed by firm, upward strokes. Don’t forget to rinse thoroughly and hydrate immediately afterward. Caring for your glove ensures it remains effective and hygienic for future use. Your skin will thank you for this revitalizing ritual. Go ahead and give yourself that luxurious spa experience at home!
Frequently Asked Questions
How often should I use a hammam glove?
For most people, using a hammam glove once or twice a week is ideal. This frequency helps remove dead skin cells without over-exfoliating. Listen to your skin; if it feels sensitive, reduce usage. Consistency is key for maintaining that soft, smooth feeling. For most people, using a hammam glove once or twice a week is ideal. Our guide explains how often to use it for best results.
Can I use a hammam glove on my face?
Generally, it’s best to avoid using a traditional hammam glove on your face. The texture can be too rough for delicate facial skin. Look for a specialized, much softer exfoliating mitt designed specifically for the face if you want similar benefits for your complexion.
What if I see a lot of dead skin rolling off? Is that normal?
Yes, seeing dead skin roll off is perfectly normal and a sign that your hammam glove is working effectively! This “pilling” indicates that the glove is successfully lifting away dead skin cells. Just be sure to rinse your skin thoroughly afterward to remove all debris.
My hammam glove feels rough. Is that a problem?
A hammam glove is designed to be somewhat rough to effectively exfoliate. However, it shouldn’t feel painfully abrasive. If it feels too harsh, ensure your skin is well-soaked and warm before use. Applying a bit more body wash or a gentle soap can also help it glide more smoothly.
Can I use my hammam glove with a dry brush?
While both dry brushing and using a hammam glove are excellent exfoliation methods, it’s generally not recommended to do them at the same time. Using one after the other could lead to over-exfoliation and skin irritation. It’s best to choose one method per session for optimal skin health.