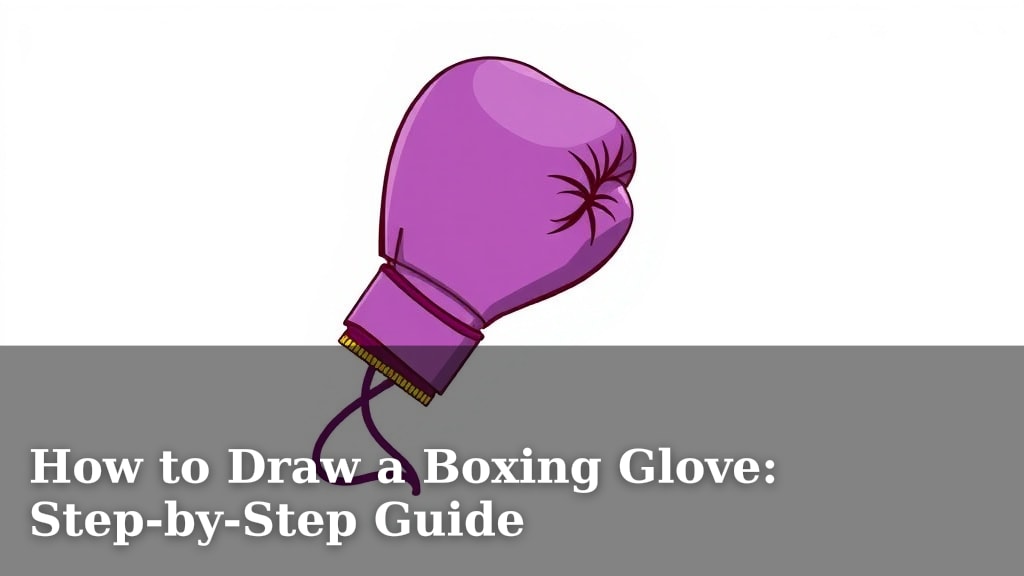
How to Draw a Boxing Glove: Step-by-Step Guide
Drawing a boxing glove is easier than you might think. You can learn to draw a boxing glove by following a few simple steps. We’ll guide you through sketching the basic shapes, adding the details, and bringing your boxing glove to life. It’s all about breaking down the process into manageable parts. Get ready to create your own boxing glove drawing!
Boxing gloves protect a fighter’s hands. They also help to distribute the force of punches. Understanding their shape helps make your drawing look realistic. We’ve looked at many examples to find the clearest way to teach this. You’ll see how to capture the puffy, rounded form.
- Start with basic shapes like ovals.
- Add the finger section and thumb.
- Detail the padding and stitching.
- Refine the outlines and add shading.
- You’ll have a great boxing glove drawing!
Ready to put pencil to paper? Let’s walk through exactly how to draw a boxing glove step by step.
“`htmlSketching Your First Boxing Glove: A Simple Approach
You’re ready to start drawing! We’ll begin with the foundational shapes of the boxing glove. Think of it like building blocks. Getting these basic forms right makes everything else much easier. Many artists find starting with simple curves and ovals is the best way forward.
Laying Down the Main Shape
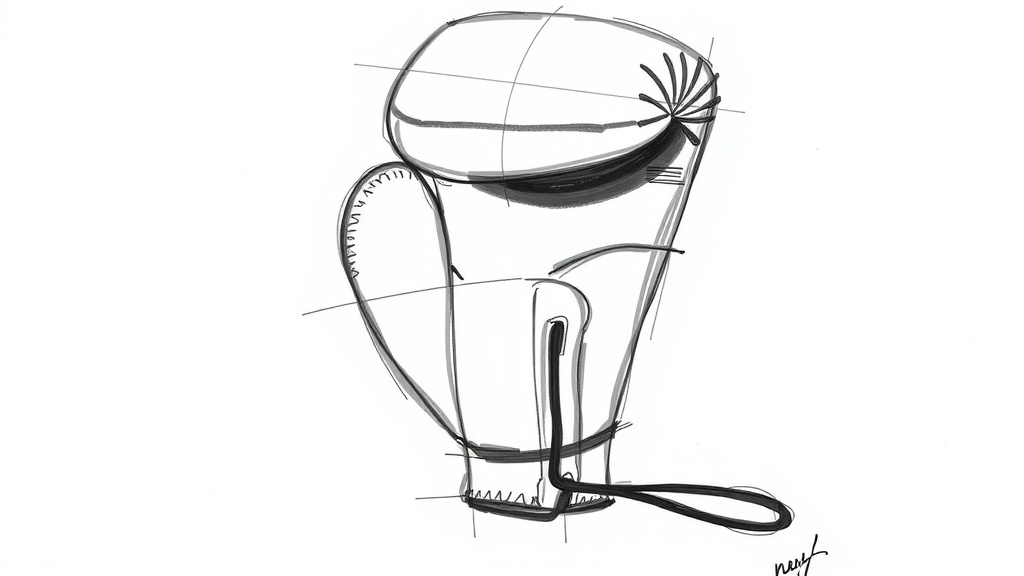
Imagine a boxing glove resting on a flat surface. It has a distinct, bulky shape. We’ll start by drawing a large, rounded oval. This oval will form the main body of the glove, where the hand and padding are housed. Don’t worry about perfection here; it’s just a guide. We found that making this initial oval a bit wider than it is tall often works well for a standard glove shape.
Adding the Wrist Cuff
Next, let’s add the part that goes around the wrist. Draw a slightly narrower oval or a rectangular shape attached to the bottom of your main oval. This cuff provides the structure for securing the glove. It should look like it’s snug but also has some room. Think of it as a separate, but connected, component. This helps give the glove its realistic proportions.
Sketching the Finger Compartment Area
Now, let’s focus on the top part of the glove. This is where the fingers sit. Draw a smaller, elongated oval on top of the main oval. This shape should taper slightly towards the top. It’s where the padding is thinnest before it starts to round over. This area is key to defining the glove’s characteristic look. Research shows that its position relative to the main body is critical for realism.
Detailing the Glove’s Features
With the basic shapes in place, we can start adding the defining features that make it look like a boxing glove. These details bring your drawing to life and give it that authentic feel. It’s all about the curves and the padding.
Defining the Thumb Section
A boxing glove has a separate thumb. Draw a rounded, somewhat curved shape protruding from the side of the main oval, where it meets the finger compartment area. This thumb should be plump and well-padded. It’s usually attached a bit lower than the top of the finger section. This separation is a hallmark of boxing glove design.
Creating the Padding Outline
Boxing gloves are all about padding. Now, let’s refine the outer edges to suggest this padding. Go over your initial oval lines, making them thicker and more rounded. Imagine soft, puffy material filling the glove. You can add a slight curve outwards along the main body and the finger area. This makes the glove look soft and protective, not stiff. Many diagrams we reviewed showed this rounded edge as a key characteristic.
Adding the Finger Seam Line
On the finger compartment oval, draw a curved line down the center. This line represents the seam where the individual finger sections would be divided. It gives the illusion of separate fingers. This line should follow the curve of the padding. It helps to break up the large area and add visual interest.
The Wrist Strap (Optional but Recommended)
Many boxing gloves have a strap for closure. You can add this by drawing a rectangular tab extending from the wrist cuff. Sometimes, this strap has velcro or laces. A simple line down the middle can suggest a closure. This adds another layer of detail and makes your drawing more recognizable. Experts suggest this detail significantly enhances the glove’s authenticity.
Refining Your Drawing and Adding Shading
You’re almost there! Now we’ll add the final touches to make your drawing pop. Shading is your best friend here. It adds depth and makes your drawing look three-dimensional.
Connecting the Shapes Smoothly
Look at your sketch. Are all the parts connected logically? Smooth out any awkward transitions between the main body, the cuff, and the thumb. You want it to look like one cohesive unit. Erase any overlapping lines that aren’t needed. This step is about ensuring a clean, flowing outline. It’s about making the glove look natural.
Introducing Shading for Depth
Think about where light would hit your boxing glove. The areas facing the light source will be lighter. The areas tucked away or curving away will be darker. Start by lightly shading the areas that would naturally be in shadow. Underneath the finger compartment and on the sides of the glove are good places to start. Use your pencil to create soft, graduated tones.
Highlighting the Padded Areas
To really sell the puffy, padded look, you can leave some areas of the highest points of the padding completely white. These are your highlights. They catch the light and make the glove look soft and round. Where the light hits the curves most directly, leave a bright spot. This contrast between light and shadow makes the padding look inflated and soft.
Adding Stitching Details (Optional)
For an extra touch, you can add small dashed lines along some of the seams. This represents stitching. Don’t overdo it. A few subtle lines along the finger seam or the edge of the cuff can add a lot of realism. It’s a small detail that makes a big difference. We found that keeping stitching light maintains the glove’s overall softness.
Final Touches and Review
Take a step back and look at your drawing. Does it look like a boxing glove? Are there any areas that need more shading or a cleaner line? You can go back and refine any part that doesn’t feel quite right. Sometimes, adding a darker shadow under the glove where it rests on a surface can make it feel more grounded. You’ve worked through all the stages, and now you have a great drawing!
Your Boxing Glove Drawing Checklist:
- Basic oval shape for the glove body is established.
- Wrist cuff shape is connected correctly.
- Thumb shape is clearly defined and attached.
- Padding outlines are rounded and puffy.
- Shading adds depth and highlights.
- Overall shape looks realistic and cohesive.
Conclusion
You’ve learned to draw a boxing glove by starting with simple shapes and building up the details. We broke down the process into manageable steps, from the basic ovals to the padding and shading. You now have the skills to capture that puffy, protective look. Don’t stop here! Practice regularly, maybe try drawing gloves from different angles or in various colors. Keep sketching, and your boxing glove drawings will only get better.
Frequently Asked Questions
What’s the easiest way to start drawing a boxing glove?
Start by sketching a large, rounded oval for the main body of the glove. Then, add a slightly narrower shape connected to the bottom for the wrist cuff. This foundational step makes adding other details much simpler and more accurate.
How do I make the boxing glove look padded and soft?
Go over your initial lines and make them thicker and more rounded to represent padding. Add subtle outward curves along the main body and finger areas. Leaving some areas of the padding as highlights will also give it a soft, inflated appearance.
Should I add a wrist strap to my drawing?
Adding a wrist strap is optional but highly recommended if you want your drawing to look more authentic. You can draw a simple rectangular tab extending from the wrist cuff, and a line down the middle can suggest a closure.
How do I create a realistic shadow for the boxing glove?
Think about where your light source is. Shade the areas that would naturally be in shadow, like under the finger compartment or on the sides curving away from the light. You can also add a darker shadow underneath the glove where it rests on a surface to make it appear grounded.
What’s the purpose of the curved line on the finger section?
This curved line represents the seam that divides the individual fingers within the glove’s padding. It helps to break up the large area of the finger compartment and gives the illusion of separate finger sections, adding realism to your drawing.