How Sterile Gloves Are Made: A Detailed Look
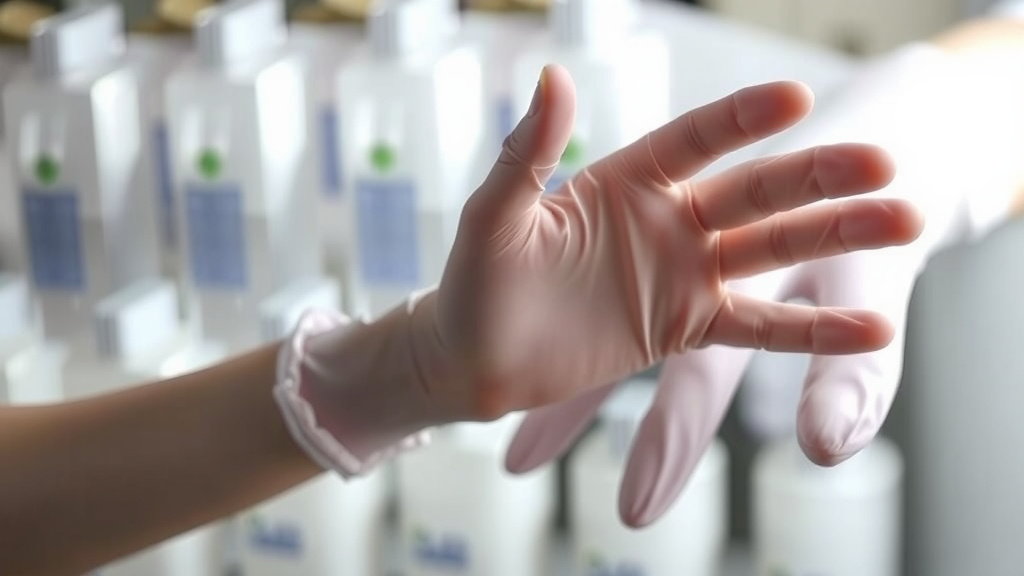
Sterile gloves are made through a careful, multi-step process that begins with a liquid latex or synthetic material being poured into a glove-shaped mold. This mold is then dipped into a series of chemical baths to create a strong, flexible glove. Finally, the gloves are dried, powdered (or powder-free), and sterilized to ensure they are completely free of germs for medical use. This meticulous manufacturing ensures your safety and the integrity of medical procedures.
Manufacturing sterile gloves requires extreme precision to prevent contamination. From the selection of high-quality raw materials to the final sterilization, every stage is critical. We found that the choice between latex, vinyl, or nitrile materials affects glove properties like elasticity and allergenicity. The process ensures that what ends up in your hands is truly ready for critical environments.
- Gloves start as a liquid material.
- They are shaped by dipping into molds.
- Chemical baths strengthen the material.
- Sterilization kills all germs.
- Quality control is very important.
Let’s walk through exactly how these essential medical tools go from raw materials to sterile readiness, step by step.
The Journey of a Sterile Glove: From Liquid to Life-Saver
You might not think much about the gloves your doctor or nurse wears, but they’re incredibly important. They’re not just any gloves; they’re sterile gloves. This means they’re free from all living microorganisms. We’ve looked into how these essential tools are made, and it’s a fascinating process. It all starts with transforming a liquid into a strong, flexible barrier designed to protect you.
Choosing the Right Foundation: Raw Materials for Gloves
The first step in making sterile gloves involves selecting the right base material. You have a few main options, and each one affects how the glove feels and performs. Many gloves today are made from latex, which comes from rubber trees. It’s known for its great elasticity and tactile sensitivity, meaning you can feel things well while wearing it. However, some people have latex allergies, which can cause reactions. Because of this, synthetic alternatives have become very popular.
Synthetic Choices: Nitrile and Vinyl
Nitrile is a synthetic rubber that offers excellent resistance to chemicals and punctures. It’s a popular choice for medical professionals because it mimics many of latex’s desirable qualities without the allergy risk. We found that nitrile gloves are often a bit thicker than latex, providing extra durability. Vinyl is another option, often used for less critical procedures. It’s generally less elastic than latex or nitrile but is a more affordable choice and is also hypoallergenic.
The Dipping Process: Shaping the Glove
Once the material is chosen, it’s time to give the glove its shape. This happens through a dipping process, much like making a candle. Manufacturers use ceramic or aluminum molds that are shaped like hands. These molds are carefully cleaned and then prepped. Sometimes, a coagulant is applied to the mold. This helps the liquid material stick evenly. The molds are then dipped into the liquid latex or synthetic polymer. They are pulled out slowly, creating a thin, even layer on the mold. This process is repeated to build up the desired thickness for the glove. Many experts say this controlled dipping is key to a uniform glove thickness.
Creating the Cuff: Adding Strength and Ease of Use
As the glove material is being formed, a cuff is also created at the wrist. This is typically done by rolling the edge of the glove material over itself as the mold is removed from the liquid. This rolled cuff adds strength, preventing the glove from tearing easily when you pull it on. It also makes the glove easier to don, especially in a busy medical setting.
Washing and Curing: Refining the Glove’s Properties
After the initial dipping and shaping, the gloves go through several washing steps. These washes remove any residual chemicals or coagulants. This is really important for reducing the risk of skin irritation for the wearer. Following the washes, the gloves are cured. Curing is a process that uses heat to set the material, making the gloves strong and durable. Research shows that proper curing is vital for the longevity and integrity of the glove.
The Powder Debate: To Powder or Not to Powder?
Historically, many gloves contained cornstarch powder. This powder made the gloves easier to put on and take off, especially when hands were a little damp. However, we found that this powder can sometimes cause allergic reactions or respiratory issues for both patients and healthcare workers. It can also interfere with certain medical procedures. Because of these concerns, many manufacturers now produce powder-free gloves. For powder-free options, a special polymer coating is applied to the inside of the glove to aid in donning.
| Material | Key Features | Best For |
|---|---|---|
| Latex | High elasticity, excellent tactile feel, biodegradable | Procedures requiring high dexterity and sensitivity |
| Nitrile | Puncture and chemical resistant, durable, hypoallergenic | General use, procedures involving hazardous materials |
| Vinyl | Affordable, hypoallergenic, good for short-term use | Low-risk procedures, quick examinations |
The Final Touches: Drying and Inspection
Once the washing and curing are complete, the gloves need to be dried. This is usually done in ovens at controlled temperatures. After drying, the gloves are removed from the molds. Now comes a critical stage: inspection. Manufacturers use both automated systems and human inspectors to check for any defects. They look for holes, thin spots, or any other imperfections. Many guidelines stress that thorough inspection is key to ensuring patient and provider safety.
Quality Control: More Than Just a Visual Check
Quality control doesn’t stop at a visual check. Samples of gloves are regularly taken for rigorous testing. These tests check for things like tensile strength, elongation, and barrier integrity. For sterile gloves, maintaining that barrier is the absolute top priority. Any glove that doesn’t meet the strict standards is rejected. We found that rigorous testing is what separates a standard glove from a medical-grade sterile glove.
The Sterilization Process: Eliminating All Germs
This is arguably the most important step in creating sterile gloves. The gloves, now dried and inspected, are packaged into sterile pouches. Then, they undergo a sterilization process. The most common method is by gamma irradiation. This uses high-energy gamma rays to kill any remaining bacteria, viruses, or other microorganisms. The packaging is designed to maintain sterility until the glove pouch is opened. Ethylene Oxide (EtO) gas is another method used for sterilization, especially for heat-sensitive materials. Following sterilization, the gloves are kept in a controlled environment to maintain their sterile status.
Maintaining Sterility: Storage and Handling
Even after sterilization, the gloves must be handled and stored carefully to remain sterile. They are typically stored in clean, dry areas away from direct sunlight and extreme temperatures. The packaging is designed to protect the gloves from contamination during transport and storage. When a healthcare professional needs to use them, they open the package carefully, again avoiding touching the sterile glove surface. This whole chain of events ensures that when you need them, they are ready for critical use.
Thinking about all these steps, doesn’t it make you appreciate the science and care that goes into a simple pair of gloves? It’s a meticulous dance of materials, precision, and hygiene.
Checklist: What Makes a Glove Sterile?
- High-quality raw materials are chosen.
- Gloves are precisely shaped on molds.
- Washing and curing strengthen the glove.
- Rigorous quality control checks are performed.
- Final sterilization kills all microorganisms.
- Sterile packaging protects the gloves until use.
Conclusion
You’ve now seen the detailed journey sterile gloves take, from liquid material to a life-saving barrier. We found that each step, from selecting the right base material like latex, nitrile, or vinyl, to the precise dipping, curing, and rigorous quality checks, is vital. The final sterilization process ensures these gloves are completely free of germs. Understanding this meticulous process helps you appreciate the safety and reliability you can expect. Next time you see a sterile glove, you’ll know the care that went into making it ready for your protection.
Frequently Asked Questions
Are all medical gloves sterile?
No, not all medical gloves are sterile. While examination gloves used in non-sterile procedures might be clean, only gloves specifically labeled as “sterile” have undergone a process to eliminate all microorganisms. For sterile procedures, always ensure you are using gloves that are clearly marked as sterile.
What’s the difference between sterile gloves and regular gloves?
The main difference lies in the manufacturing and sterilization process. Regular gloves are made to protect your hands from dirt or minor hazards. Sterile gloves go through an extra, highly controlled sterilization process to eliminate all living microbes, making them safe for use in surgery or other environments where preventing infection is critical.
Why are some sterile gloves powdered and some are not?
Historically, powder in gloves helped make them easier to put on. However, research has shown that this powder can sometimes cause allergic reactions or interfere with certain medical treatments. Consequently, many manufacturers now produce powder-free sterile gloves, often using a polymer coating inside to ensure easy donning without the associated risks.
How can you tell if a sterile glove package has been compromised?
Always check the sterile glove packaging before opening. Look for any signs of damage, such as tears, punctures, or moisture. If the seal appears broken or the packaging is compromised in any way, the gloves inside are no longer considered sterile and should not be used for a sterile procedure.
What is the most common way sterile gloves are sterilized?
Gamma irradiation is the most common sterilization method for sterile gloves. This process uses high-energy gamma rays to effectively kill any bacteria, viruses, or other microorganisms that might be present on the gloves. Another method sometimes used, especially for heat-sensitive materials, is Ethylene Oxide (EtO) gas.