How to Soften a Leather Baseball Glove: Quick Tips
You can soften a leather baseball glove by applying a conditioning treatment and working the glove. This process helps the leather become more pliable and game-ready. It’s a key step for any new or stiff glove, helping you get that perfect pocket faster. Don’t worry, it’s not as complicated as you might think!
Getting your glove ready for action is about more than just appearance. Proper softening ensures your glove feels like an extension of your hand. This means better control and fewer fumbles on the field. Many players spend a lot of time on this step to get the best performance.
- Apply a leather conditioner or glove oil.
- Work the glove by hand to break in the leather.
- Use a mallet or the heel of your hand for stubborn spots.
- Store the glove properly to maintain its shape.
- Be patient; breaking in a glove takes time and effort.
Ready to turn that stiff new glove into your favorite piece of equipment? Let’s walk through exactly how to do it, step by step.
Getting Your Leather Baseball Glove Game-Ready
So, you’ve got a new leather baseball glove. It’s stiff, maybe a little awkward, and definitely not ready for that diving catch. We’ve all been there. The good news? Softening it up is totally doable! It’s like breaking in a new pair of shoes. You want that glove to feel like a natural extension of your hand, not a brick.
The goal is to make the leather more pliable. This means a softer feel and a glove that moves with you. A well-broken-in glove means a better pocket. It helps you secure the ball and make those quick transfers. It really can make a difference on the field.
The Essential Tools for Softening
Before you start, let’s gather what you need. You don’t need a whole workshop for this. Just a few simple items will get the job done. Having the right supplies makes the whole process smoother. Think of it as preparing for a mini-project that pays off big.
Your Glove Conditioning Arsenal
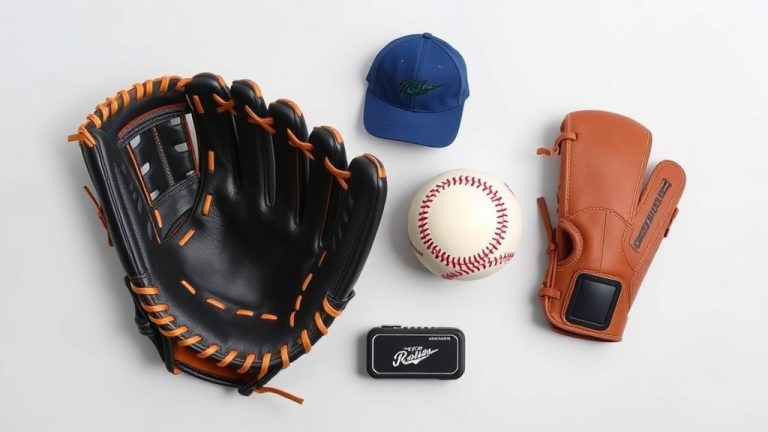
First up, you’ll need a glove conditioner or oil. There are tons of options out there. Some players prefer dedicated glove oils. Others use a good quality leather conditioner. You can even find products specifically marketed for baseball gloves. We found that products with natural oils, like lanolin or neatsfoot oil, tend to work well. Many guidelines suggest avoiding petroleum-based products, as they can sometimes damage the leather over time (National Baseball Hall of Fame). Always check the label for what’s recommended.
What if you don’t have a fancy glove oil? You can actually use a small amount of all-purpose leather conditioner. Just make sure it’s designed for fine leather goods. A little goes a long way. You’re not trying to drench the glove.
Tools for Working the Leather
Next, you’ll want some tools to help you shape the glove. Your hands are your primary tools, of course. But a glove mallet can be a real lifesaver for stubborn areas. You can buy these online or at sporting goods stores. They often have a rounded end, perfect for pounding out stiffness. If you don’t have a mallet, don’t worry!
The heel of your hand is a great substitute. You can also use a clean baseball. Just the act of squeezing and shaping the glove helps. Think of it like giving your glove a deep tissue massage. You’re working out the kinks so it can perform better.
Step-by-Step: Your Glove Break-In Plan
Now for the fun part! This is where you transform that stiff leather into a responsive glove. Patience is key here. It won’t happen overnight, but consistent effort makes a big difference. We found that breaking it down into manageable steps makes it less daunting.
Step 1: Apply the Conditioner Sparingly
Start by applying a small amount of conditioner to a clean, dry glove. Use a soft cloth or your fingertips. You want to cover the entire glove, inside and out. Pay special attention to the pocket area and the finger stalls. The goal is to moisturize the leather, making it more flexible.
Don’t overdo it! Too much oil can make the glove heavy and greasy. It can also attract dirt. You’re aiming for a subtle sheen, not a soaking wet look. Think of it like applying lotion to your hands. You want enough to feel it, but not so much that it feels sticky.
Step 2: Work the Glove by Hand
This is where you really get hands-on. Take the glove and flex it open and closed. Really squeeze it. Try to bend the leather in different directions. Focus on the crease where the pocket forms. You want to encourage that natural pocket shape.
Imagine you’re mimicking how you’d catch a ball. Fold the glove in half, then open it wide. Repeat this motion several times. Do this for a few minutes. It might feel awkward at first, but this repetitive motion starts to loosen the leather fibers.
Step 3: Target Stubborn Areas
Sometimes, certain spots remain stiff. This is where your mallet or the heel of your hand comes in. Gently pound the stiff areas. Focus on the “finger break” and the heel of the glove. You can also use a baseball placed in the pocket and then close the glove around it.
This method helps to flatten and soften the leather where it needs it most. Be firm but not aggressive. You don’t want to damage the stitching or the leather itself. It’s about persuasion, not force. Many players report this step is crucial for creating a deep pocket (Popular Baseball Forums).
Step 4: The Overnight Compression Trick
Here’s a popular method many players swear by. After conditioning and working the glove, place a baseball in the pocket. Then, close the glove around it. You can secure it with a large rubber band or some string. For an extra boost, place the glove inside a plastic bag. This helps keep the moisture from the conditioner from evaporating too quickly.
Leave it like this overnight, or for at least 8-12 hours. This compresses the leather in the pocket, helping it retain its shape. When you take it out, it should feel noticeably softer and more formed.
Step 5: Repeat and Refine
This entire process is not a one-time deal. Repeat these steps for several days. Each session might only take 10-15 minutes. The more you work the glove, the softer and more comfortable it will become. You’ll start to feel the leather yielding and molding to your hand.
You’ll notice the pocket developing. The hinges will loosen up. The glove will start to feel like *your* glove. Keep applying conditioner sparingly and working it. It’s a gradual transformation, much like training for a sport.
Maintaining Your Glove’s Shape and Softness
Once your glove is feeling great, you need to keep it that way. Proper storage is key. You don’t want all your hard work to go to waste. A glove left in a batting cage or stuffed in a equipment bag will quickly lose its shape.
The Right Way to Store Your Glove
When you’re not using your glove, store it properly. The best way is to keep it in the pocket shape you’ve created. You can use that baseball again! Place it in the pocket and close the glove around it. Then, you can store it in a cool, dry place. Some players use a dedicated glove bag or a clean towel to protect it.
Avoid extreme temperatures. Don’t leave it in a hot car or a damp basement. Consistent, moderate conditions help preserve the leather’s integrity. This helps prevent it from drying out or becoming overly saturated.
Here’s a quick checklist for your glove care routine:
- Apply conditioner every few weeks.
- Work the glove after each conditioning.
- Store with a ball in the pocket.
- Keep in a cool, dry place.
- Avoid direct sunlight for long periods.
- Wipe down after each game.
When to Re-Condition
How often you need to re-condition depends on how often you use your glove and the climate. If your glove starts to feel dry or stiff again, it’s time for another treatment. This might be every few weeks for active players, or only a few times a season for casual use. You’ll get a feel for what your glove needs over time. It’s a partnership, after all!
Conclusion
You’ve learned that softening your leather baseball glove is a hands-on process. It involves using the right conditioner and consistently working the leather. Remember to apply conditioner sparingly, focus on flexing and shaping the glove, and use a mallet or your hand for tough spots. Storing your glove properly with a ball inside will help maintain its hard-earned shape. With a little patience and consistent effort, your glove will feel like a natural extension of your hand. Start breaking in your glove today to improve your game!
Frequently Asked Questions
How often should I condition my baseball glove?
You should condition your glove every few weeks, or whenever it starts to feel dry or stiff. Active players might need to condition more often than casual players. The climate you play in can also affect how quickly your glove dries out.
Can I use any leather conditioner on my baseball glove?
It’s best to use a conditioner specifically designed for baseball gloves or a high-quality, all-purpose leather conditioner. Look for products with natural oils. Avoid petroleum-based products, as they can sometimes damage the leather over time.
Is it okay to use olive oil or coconut oil on my glove?
While some players use natural oils like olive or coconut oil, dedicated glove conditioners are generally recommended. These products are formulated to be safe for glove leather and provide the right balance of conditioning without being too heavy.
How long does it take to break in a new baseball glove?
Breaking in a new glove typically takes several days to a couple of weeks of consistent effort. Some gloves may take longer than others. The more you work the glove and apply conditioning, the faster it will become game-ready.
Should I put my glove in the oven or microwave to soften it?
No, you should never put your baseball glove in an oven or microwave. High heat can severely damage the leather, making it brittle and potentially ruining the glove. Stick to manual methods and proper conditioning products.